#20250107
서버 도메인 & DB 세팅
word.st.kr
web1.st.kr
web2.st.kr
dvwa.st.kr
계정 생성
adduser word
adduser web1
adduser web2
adduser dvwa
index.html 삭제
public_html 안에 교수님이 주신 zip 파일 업로드 & 압축 풀기 (unzip)
chmod 777 $HOME
chmod 755 ~/public_html
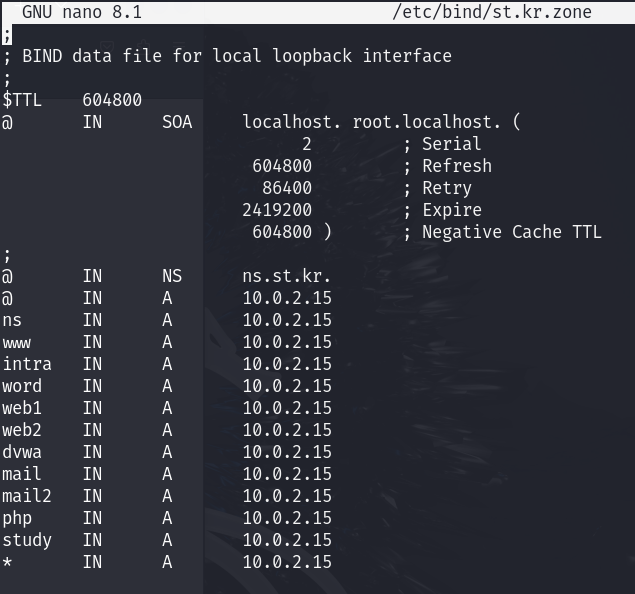
> nano /etc/bind/st.kr.zone
> nano /etc/apache2/sites-available/hosting.conf
<VirtualHost *:80>
DocumentRoot /home/word/public_html/wordpress
ServerName word.st.kr
ServerAdmin word@word.st.kr
ErrorLog /home/word/public_html/logs/error.log
CustomLog /home/word/public_html/logs/access.log combined
</VirtualHost>
<VirtualHost *:80>
DocumentRoot /home/web1/public_html
ServerName web1.st.kr
ServerAdmin web1@web1.st.kr
ErrorLog /home/web1/public_html/logs/error.log
CustomLog /home/web1/public_html/logs/access.log combined
</VirtualHost>
<VirtualHost *:80>
DocumentRoot /home/web2/public_html
ServerName web2.st.kr
ServerAdmin web2@web2.st.kr
ErrorLog /home/web2/public_html/logs/error.log
CustomLog /home/web2/public_html/logs/access.log combined
</VirtualHost>
<VirtualHost *:80>
DocumentRoot /home/dvwa/public_html
ServerName dvwa.st.kr
ServerAdmin dvwa@dvwa.st.kr
ErrorLog /home/dvwa/public_html/logs/error.log
CustomLog /home/dvwa/public_html/logs/access.log combined
</VirtualHost>
---
systemctl restart apache2
systemctl restart named
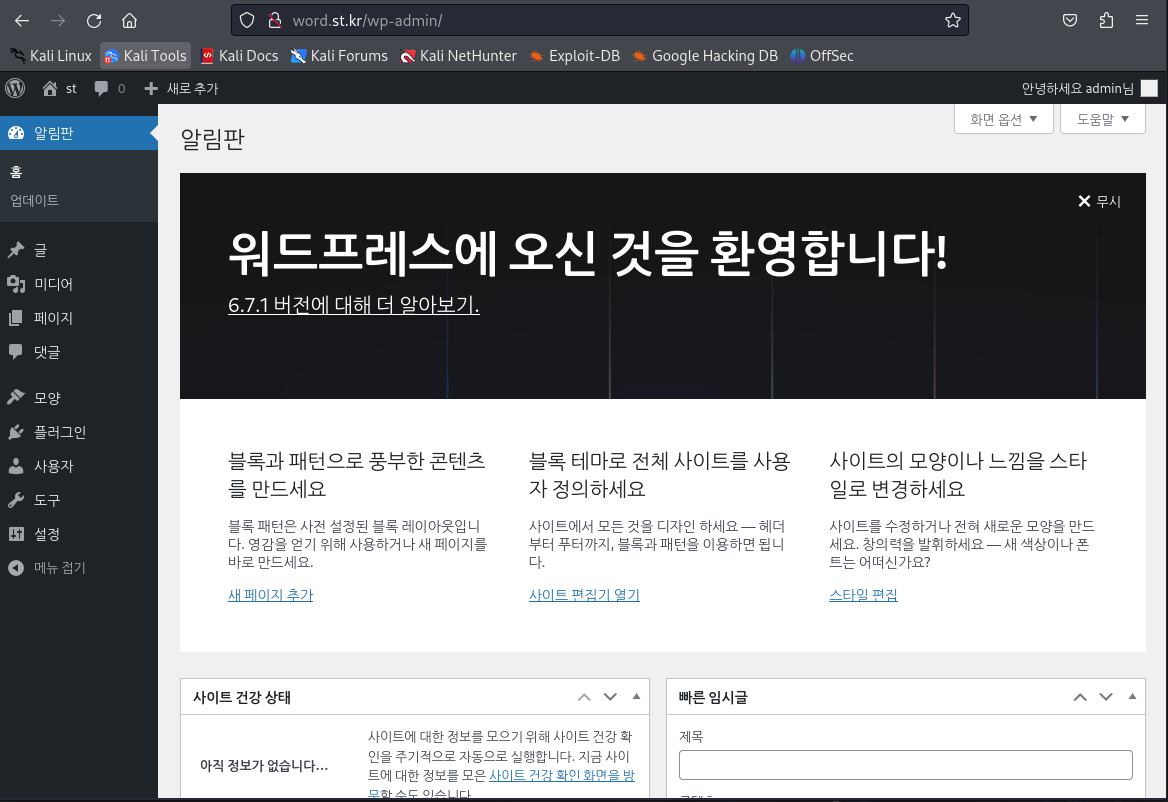
wordpress (word.st.kr) 설정
root > mysql
CREATE DATABASE word;
CREATE USER 'word'@'localhost' IDENTIFIED BY '123456';
GRANT ALL PRIVILEGES ON word.* TO 'word'@'localhost';
FLUSH PRIVILEGES;
word > cd /home/word/public_html/wordpress
word > cp wp-config-sample.php wp-config.php
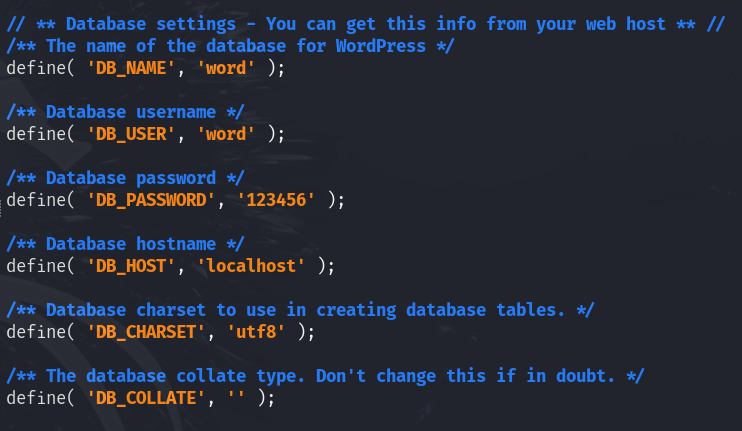
word > nano wp-config.php
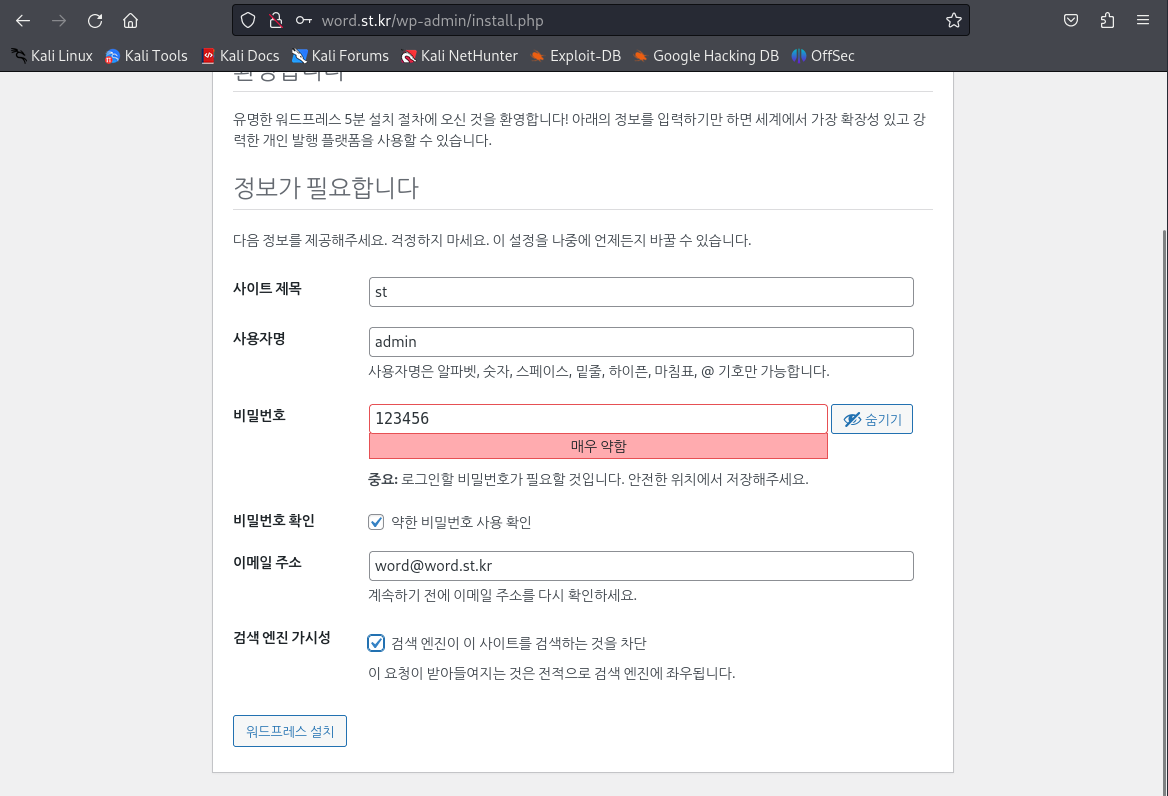
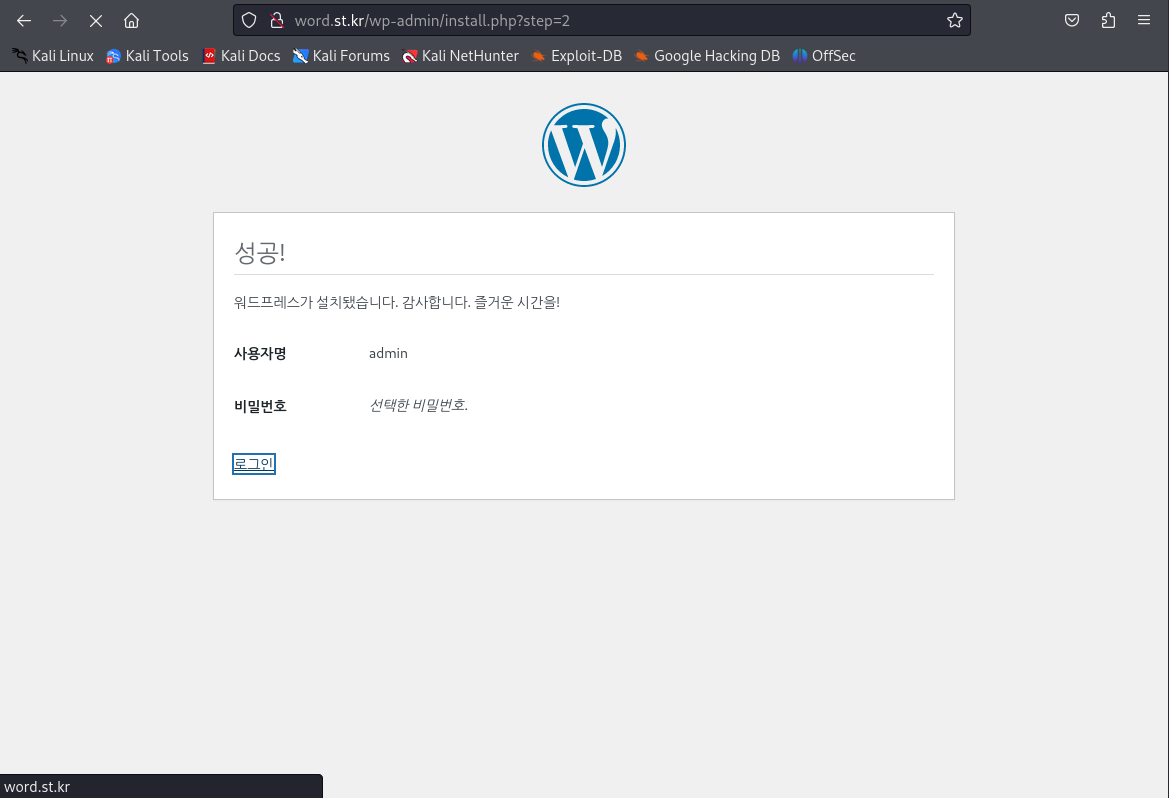
웹 새로고침 -> 지금 설치하기
-----
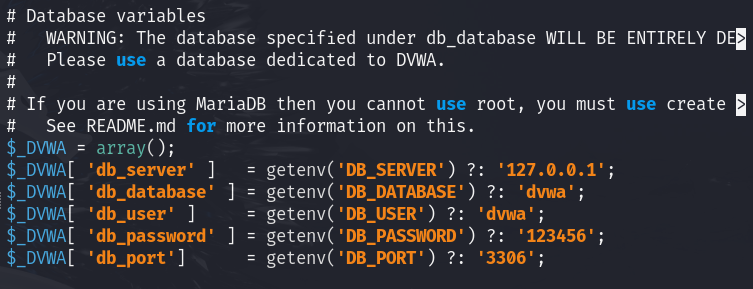
dvwa (dvwa.st.kr) 설정
root > mysql
CREATE DATABASE dvwa;
CREATE USER 'dvwa'@'localhost' IDENTIFIED BY '123456';
GRANT ALL PRIVILEGES ON dvwa.* TO 'dvwa'@'localhost';
FLUSH PRIVILEGES;
dvwa.st.kr 접속해보면
DVWA System error - config file not found. Copy config/config.inc.php.dist to config/config.inc.php and configure to your environment.
라고 뜬다. 그러므로 에러에 나온대로 해결해준다.
dvwa > cd /home/dvwa/public_html/config
dvwa > cp config.inc.php.dist config.inc.php
dvwa > nano config.inc.php
---
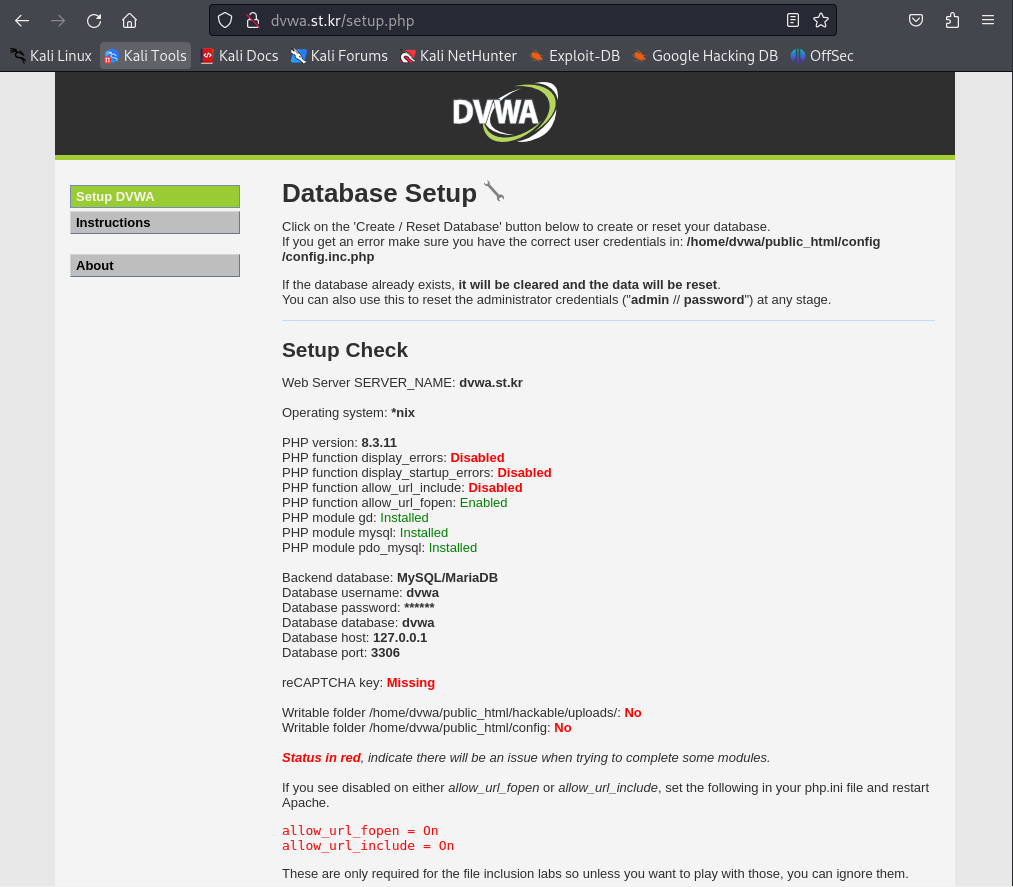 빨간 글씨 해결
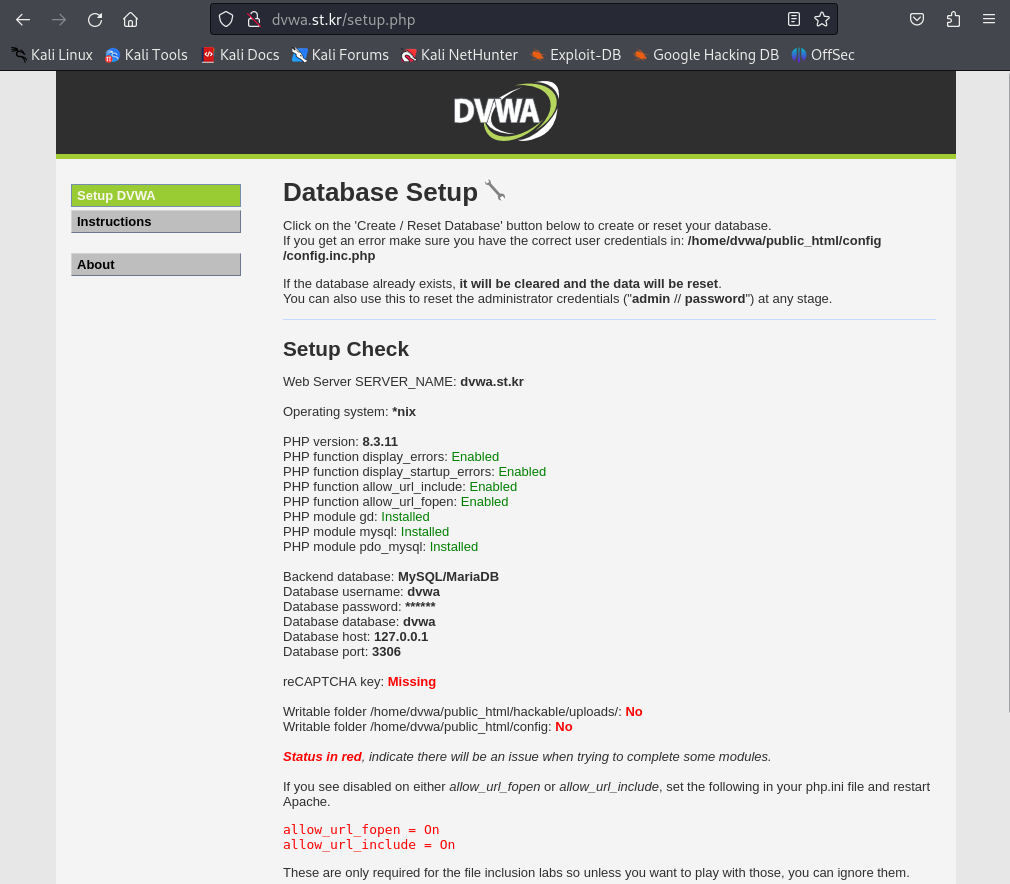
1. Disabled
> nano /etc/php/8.3/fpm/php.ini
allow_url_open = On
allow_url_include = On
display_errors = On
display_startup_errors=On
2. Writable folder /home/dvwa/public_html/hackable/uploads/: No
Writable folder /home/dvwa/public_html/config: No
cd /home/dvwa/public_html
chmod 777 config
cd /home/dvwa/public_html/hackable
chmod 777 uploads
Writable folder /home/dvwa/public_html/hackable/uploads/: Yes
Writable folder /home/dvwa/public_html/config: Yes
로 변경됨.

웹의 밑에 있는 Create / Reset Database 클릭 하면 로그아웃이 된다.
아이디와 패스워드가 변경됨.
로그인 - admin / password
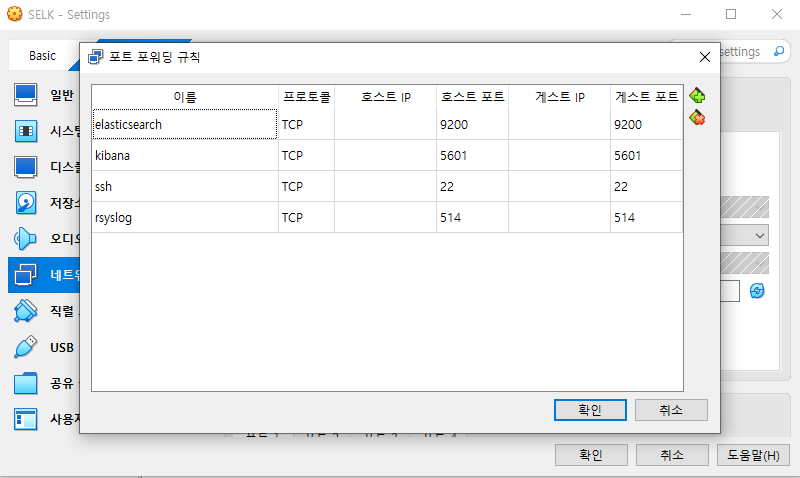
SELK 서버 새로 가져오기
포트포워딩
rsyslog 시스템 구축
/etc/hostname > log
3대 서버로부터 전송된 로그를 분석 및 저장.
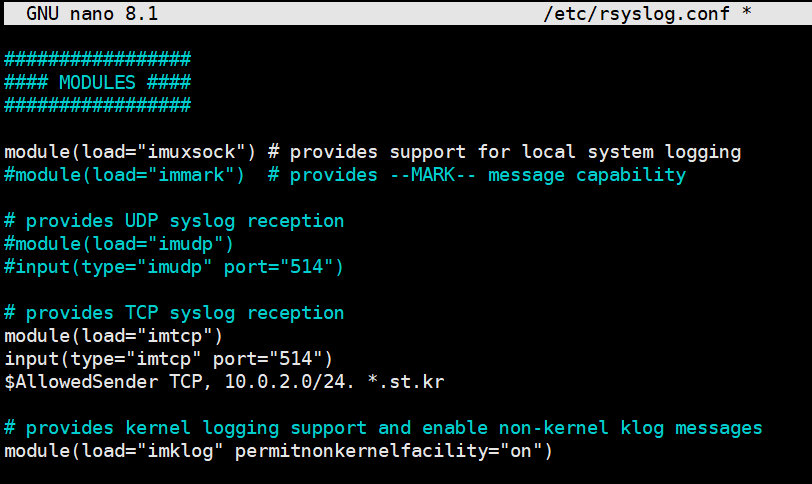
nano /etc/rsyslog.conf
주석 해제
#modul(load="imtcp")
#input(type="imctp" port="514")
밑에 추가.
$AllowedSender TCP, 10.0.2.0/24. *.st.kr
> apt -y install net-tools
> systemctl restart rsyslog
> netstat -ant | grep 514
로그를 DB에 저장하기
DB 설치
> apt -y install mariadb-server
> apt -y install rsyslog-mysql
123456
> mysql
> use Syslog;
> show tables;
+------------------------+
| Tables_in_Syslog |
+------------------------+
| SystemEvents |
| SystemEventsProperties |
+------------------------+
> select * from SystemEvents;
아무것도 없다.
-----
Rsync 설정
> apt -y install rsync
> nano /etc/rsyncd.conf
#create new
#any name you like
[backup]
#target directory to copy
path = /backup
#hosts you allow to access
hosts allow=10.0.2.15
hosts deny=*
list=true
uid=root
gid=root
read only=false
systemctl restart rsync
systemctl enable rsync
데이터가 전송되기 때문에 /backup 디렉터리는 저장공간이 많이 필요함.
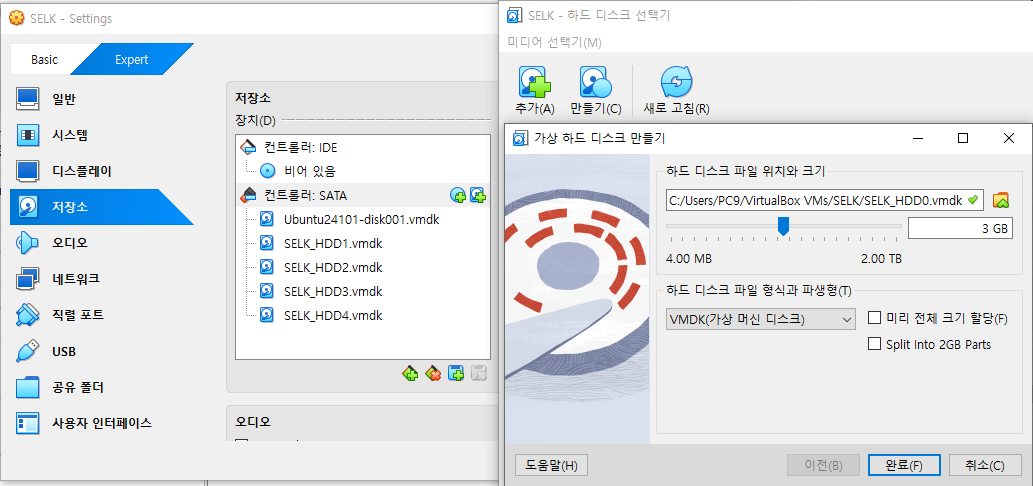
하드디스크 달기
1) LVM - 용량이 다른 하드디스크를 통합해서 사용 가능하다. (예, 500GB 2개를 달면 1TB로 사용가능)
- 3GB 1GB
2) RAID
- 2GB 2GB
서버 전원 종료 > 설정 > 저장소
----
데이터 백업 설정 (우분투 서버, 10.0.2.15)
root > cd /
> mkdir /backup
> chmod 777 /backup
> su dvwa
> cd ~
> pwd
/home/dvwa
> nano backup.sh
#!/bin/sh
set $(date)
fname="backup-$1$2$3tar.gz"
tar cvzf /backup/$fname /home/dvwa/public_html
> chmod 755 backup.sh
> su dvwa
> cd /home/dvwa
백업 실행 > ./backup.sh
> cd /backup
> ls
backup-TueJan7tar.gz
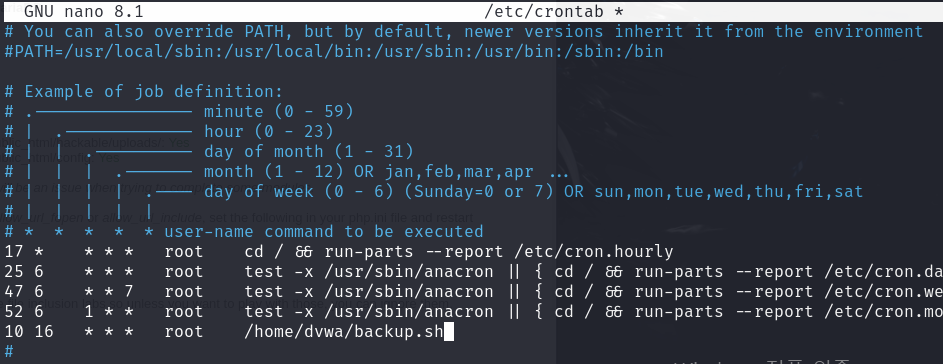
cron 설정
> su
> nano /etc/crontab
10 16 * * * root /home/dvwa/backup.sh
> systemctl restart cron
시간 설정
> sudo ln -sf /usr/share/zoneinfo/Asia/Seoul /etc/localtime
서버에서 로그서버로 백업 데이터 보내기
우분투 - 로그서버 연결 (10.0.2.3, 10.0.2.2, nameserver 10.0.2.15)
우분투에서 /etc/bind/st.kr.zone 파일 수정
log IN A 10.0.2.3 추가
--
> touch /etc/rsync_exclude.lst
> /etc/resolv.conf
nameserver 10.0.2.15
로그서버
> su
> cd /
> mkdir /backup
> chmod 777 backup
> systemctl start rsync
우분투 서버
> rsync -avz --delete --exclude-from=/etc/rsync_exclude.lst /backup log.st.kr::backup
정상적으로 실행 됨.
로그서버에서 확인 > cd /backup
우분투 서버 cron 설정 수정
> cd /etc/crontab
00 04 * * * root rsync -avz --delete --exclude-from=/etc/rsync_exclude.lst /backup log.st.kr::backup 추가
word.st.kr
web1.st.kr
web2.st.kr
dvwa.st.kr
계정 생성
adduser word
adduser web1
adduser web2
adduser dvwa
index.html 삭제
public_html 안에 교수님이 주신 zip 파일 업로드 & 압축 풀기 (unzip)
chmod 777 $HOME
chmod 755 ~/public_html
> nano /etc/bind/st.kr.zone
> nano /etc/apache2/sites-available/hosting.conf
<VirtualHost *:80>
DocumentRoot /home/word/public_html/wordpress
ServerName word.st.kr
ServerAdmin word@word.st.kr
ErrorLog /home/word/public_html/logs/error.log
CustomLog /home/word/public_html/logs/access.log combined
</VirtualHost>
<VirtualHost *:80>
DocumentRoot /home/web1/public_html
ServerName web1.st.kr
ServerAdmin web1@web1.st.kr
ErrorLog /home/web1/public_html/logs/error.log
CustomLog /home/web1/public_html/logs/access.log combined
</VirtualHost>
<VirtualHost *:80>
DocumentRoot /home/web2/public_html
ServerName web2.st.kr
ServerAdmin web2@web2.st.kr
ErrorLog /home/web2/public_html/logs/error.log
CustomLog /home/web2/public_html/logs/access.log combined
</VirtualHost>
<VirtualHost *:80>
DocumentRoot /home/dvwa/public_html
ServerName dvwa.st.kr
ServerAdmin dvwa@dvwa.st.kr
ErrorLog /home/dvwa/public_html/logs/error.log
CustomLog /home/dvwa/public_html/logs/access.log combined
</VirtualHost>
---
systemctl restart apache2
systemctl restart named
wordpress (word.st.kr) 설정
root > mysql
CREATE DATABASE word;
CREATE USER 'word'@'localhost' IDENTIFIED BY '123456';
GRANT ALL PRIVILEGES ON word.* TO 'word'@'localhost';
FLUSH PRIVILEGES;
word > cd /home/word/public_html/wordpress
word > cp wp-config-sample.php wp-config.php
word > nano wp-config.php
웹 새로고침 -> 지금 설치하기
-----
dvwa (dvwa.st.kr) 설정
root > mysql
CREATE DATABASE dvwa;
CREATE USER 'dvwa'@'localhost' IDENTIFIED BY '123456';
GRANT ALL PRIVILEGES ON dvwa.* TO 'dvwa'@'localhost';
FLUSH PRIVILEGES;
dvwa.st.kr 접속해보면
DVWA System error - config file not found. Copy config/config.inc.php.dist to config/config.inc.php and configure to your environment.
라고 뜬다. 그러므로 에러에 나온대로 해결해준다.
dvwa > cd /home/dvwa/public_html/config
dvwa > cp config.inc.php.dist config.inc.php
dvwa > nano config.inc.php
---
빨간 글씨 해결1. Disabled
> nano /etc/php/8.3/fpm/php.ini
allow_url_open = On
allow_url_include = On
display_errors = On
display_startup_errors=On
2. Writable folder /home/dvwa/public_html/hackable/uploads/: No
Writable folder /home/dvwa/public_html/config: No
cd /home/dvwa/public_html
chmod 777 config
cd /home/dvwa/public_html/hackable
chmod 777 uploads
Writable folder /home/dvwa/public_html/hackable/uploads/: Yes
Writable folder /home/dvwa/public_html/config: Yes
로 변경됨.
웹의 밑에 있는 Create / Reset Database 클릭 하면 로그아웃이 된다.
아이디와 패스워드가 변경됨.
로그인 - admin / password
SELK 서버 새로 가져오기
포트포워딩
rsyslog 시스템 구축
/etc/hostname > log
3대 서버로부터 전송된 로그를 분석 및 저장.
nano /etc/rsyslog.conf
주석 해제
#modul(load="imtcp")
#input(type="imctp" port="514")
밑에 추가.
$AllowedSender TCP, 10.0.2.0/24. *.st.kr
> apt -y install net-tools
> systemctl restart rsyslog
> netstat -ant | grep 514
로그를 DB에 저장하기
DB 설치
> apt -y install mariadb-server
> apt -y install rsyslog-mysql
123456
> mysql
> use Syslog;
> show tables;
+------------------------+
| Tables_in_Syslog |
+------------------------+
| SystemEvents |
| SystemEventsProperties |
+------------------------+
> select * from SystemEvents;
아무것도 없다.
-----
Rsync 설정
> apt -y install rsync
> nano /etc/rsyncd.conf
#create new
#any name you like
[backup]
#target directory to copy
path = /backup
#hosts you allow to access
hosts allow=10.0.2.15
hosts deny=*
list=true
uid=root
gid=root
read only=false
systemctl restart rsync
systemctl enable rsync
데이터가 전송되기 때문에 /backup 디렉터리는 저장공간이 많이 필요함.
하드디스크 달기
1) LVM - 용량이 다른 하드디스크를 통합해서 사용 가능하다. (예, 500GB 2개를 달면 1TB로 사용가능)
- 3GB 1GB
2) RAID
- 2GB 2GB
서버 전원 종료 > 설정 > 저장소
----
데이터 백업 설정 (우분투 서버, 10.0.2.15)
root > cd /
> mkdir /backup
> chmod 777 /backup
> su dvwa
> cd ~
> pwd
/home/dvwa
> nano backup.sh
#!/bin/sh
set $(date)
fname="backup-$1$2$3tar.gz"
tar cvzf /backup/$fname /home/dvwa/public_html
> chmod 755 backup.sh
> su dvwa
> cd /home/dvwa
백업 실행 > ./backup.sh
> cd /backup
> ls
backup-TueJan7tar.gz
cron 설정
> su
> nano /etc/crontab
10 16 * * * root /home/dvwa/backup.sh
> systemctl restart cron
시간 설정
> sudo ln -sf /usr/share/zoneinfo/Asia/Seoul /etc/localtime
서버에서 로그서버로 백업 데이터 보내기
우분투 - 로그서버 연결 (10.0.2.3, 10.0.2.2, nameserver 10.0.2.15)
우분투에서 /etc/bind/st.kr.zone 파일 수정
log IN A 10.0.2.3 추가
--
> touch /etc/rsync_exclude.lst
> /etc/resolv.conf
nameserver 10.0.2.15
로그서버
> su
> cd /
> mkdir /backup
> chmod 777 backup
> systemctl start rsync
우분투 서버
> rsync -avz --delete --exclude-from=/etc/rsync_exclude.lst /backup log.st.kr::backup
정상적으로 실행 됨.
로그서버에서 확인 > cd /backup
우분투 서버 cron 설정 수정
> cd /etc/crontab
00 04 * * * root rsync -avz --delete --exclude-from=/etc/rsync_exclude.lst /backup log.st.kr::backup 추가